How Can We Help?
Restoring a Backup
In the example below, we are restoring a site that has an accessible WP Admin to a previous backup. If your WP Admin is not accessible, you will need to follow this guide instead.
1. Install/Activate UpdraftPlus
If you are starting with a fresh installation of WordPress, or if UpdraftPlus is not currently installed, you will need to install and activate UpdraftPlus.
2. Find your backup files
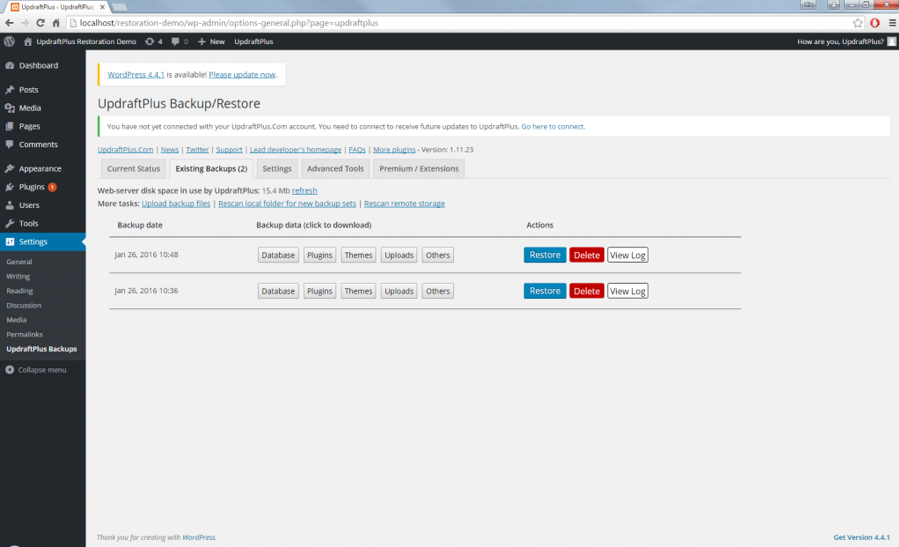
If restoring a site with a pre-existing UpdraftPlus installation, go to Settings->UpdraftPlus Backups and click the ‘Restore’ button. This will open the ‘Existing Backups’ tab. There you will see a record of your backup, and can move onto Step 3.
If you do not see a record of your backup, or if this is fresh installation, you will need to import your backup files into UpdraftPlus. There is more than one way to do this – you can use any way you like:
- Make sure that the site is set up to access your remote storage location (Google Drive), save your settings, and then press the “Rescan remote storage” link in the ‘Existing Backups’ tab.
- OR, download the backup set from your remote storage location (or wherever you have the backups stored), and upload into the ‘Existing Backups’ tab, via the ‘Upload backup files’ link.
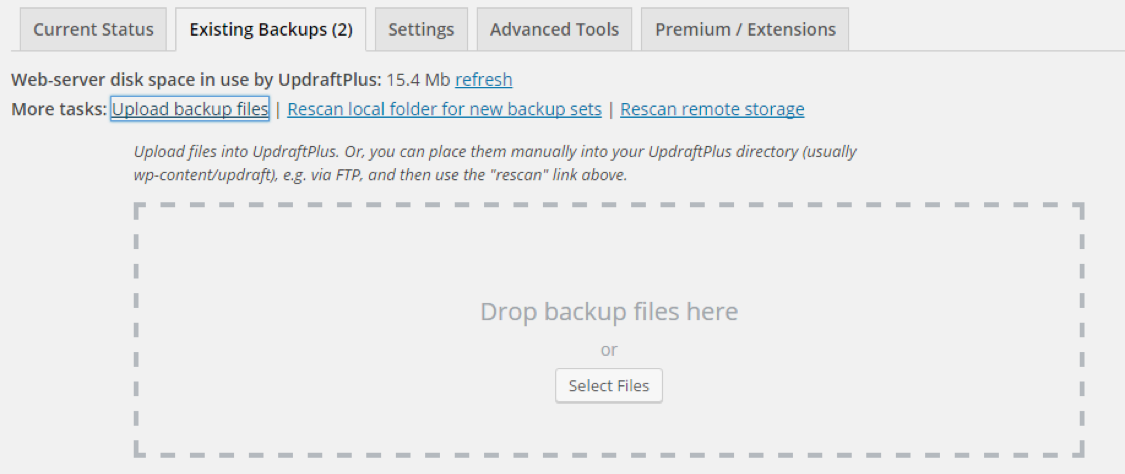
- OR, download the backup set from your remote storage location (or wherever you have the backups stored), and use FTP to upload into the UpdraftPlus folder on your destination site (wp-content/updraft by default), and press the “Rescan local folder for new backup sets” link in the ‘Existing Backups’ tab.
Once you have uploaded the backup set, you should see a record of the backup in the ‘Existing Backups’ tab
3. Start the Restoration Wizard
In the Existing Backups tab, click the ‘Restore’ button for the backup set that you want to restore (under the ‘Actions’ column). A pop-up will appear with a list of options to restore:
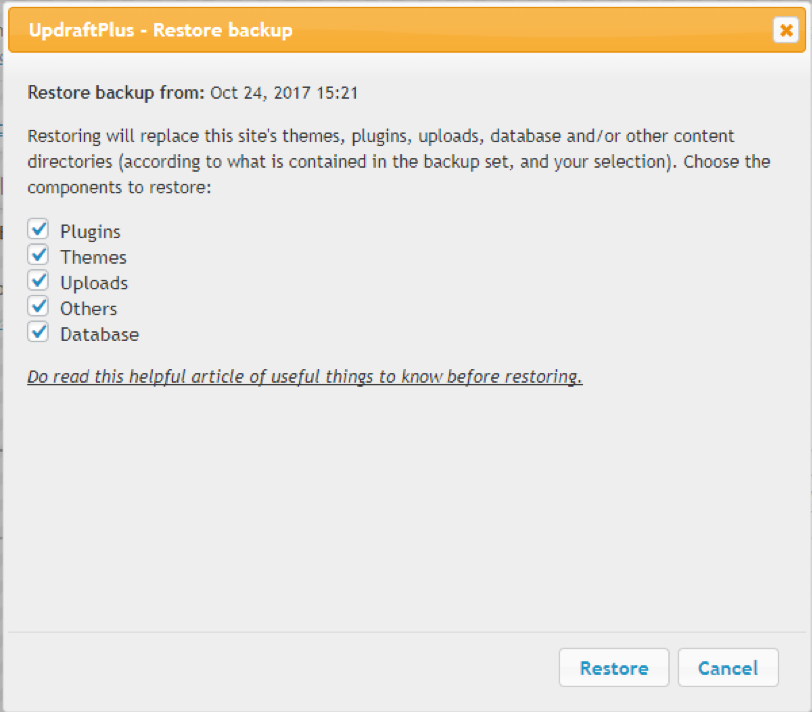
Select whichever parts of the backup that you need to restore. If restoring WP-Core files, you will need to choose whether to restore the wp-config file (This is not needed in most normal restorations).
Once you have selected your required sections to restore, click the ‘Restore’ button.
4. Begin the Restoration
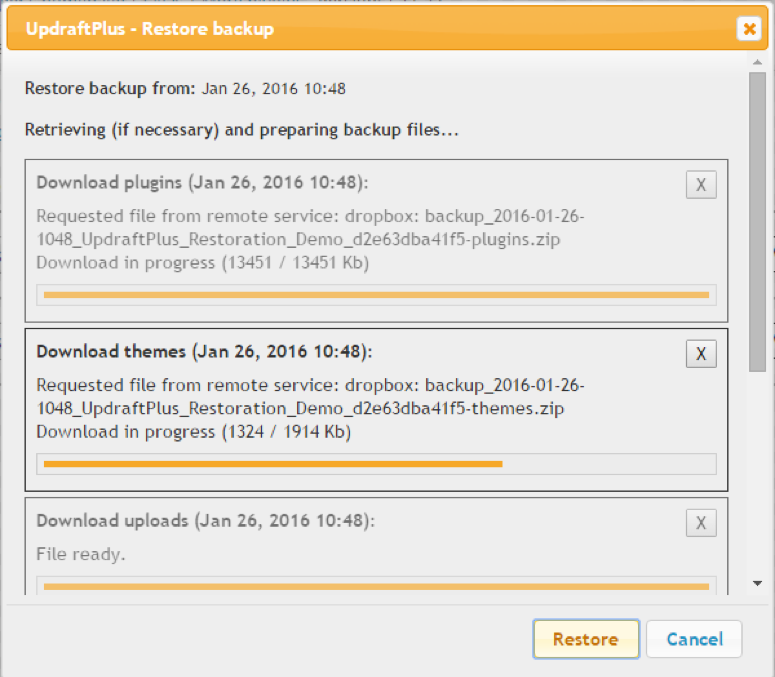
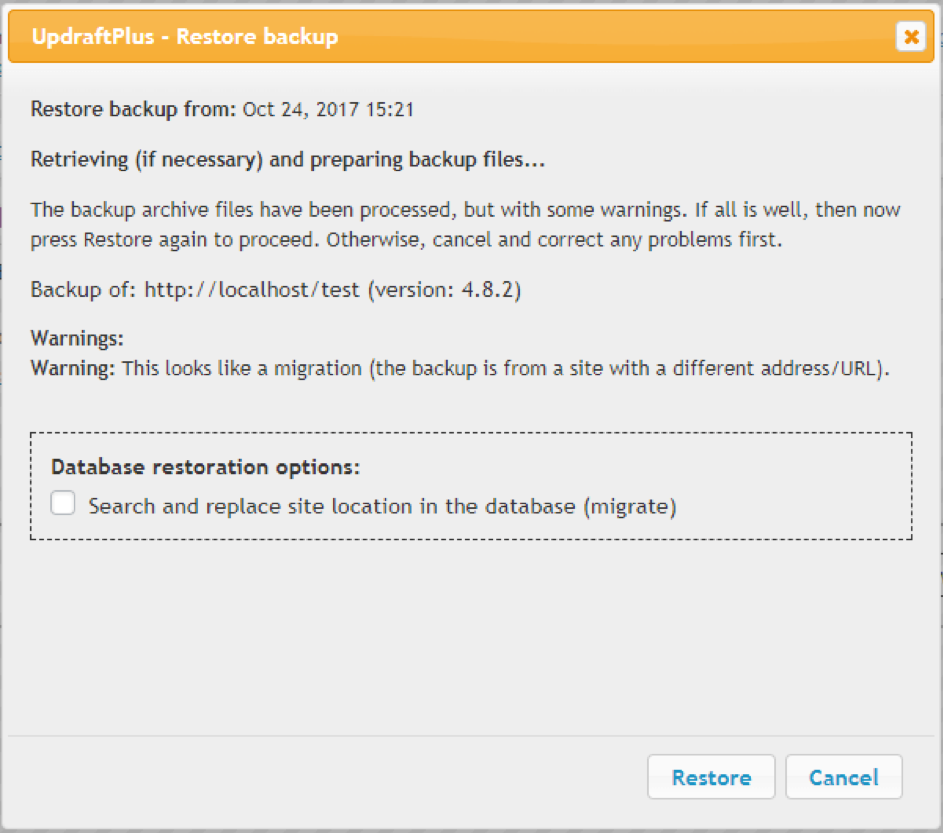
After clicking ‘Restore’, UpdraftPlus will download (if needed) and process your backup files ready for the restoration.
Once this is done, you will receive a confirmation message and warning of any problems that UpdraftPlus has found. If restoring the Database, you DO NOT need to select the ‘Search/Replace database’ option.
If you are happy that there are no problems, click ‘Restore’ again.
5. Watch the Restoration Succeed!
UpdraftPlus will then run the restoration. You can watch the progress:
At the bottom of the screen, hopefully you’ll get the “Restore successful!” message, and the option to return to the main UpdraftPlus page: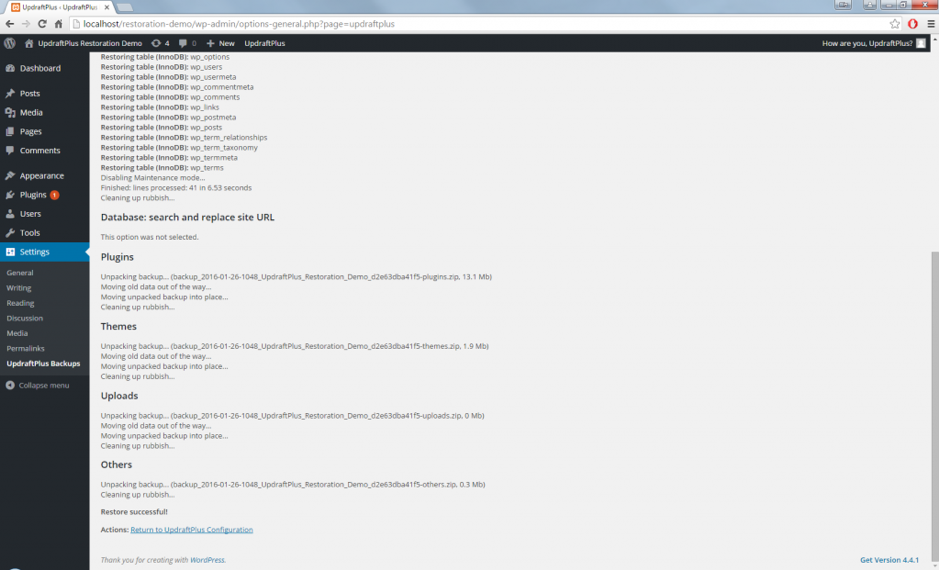
If you do return to the WordPress dashboard, you may have to log in again.
Didn’t work?
If something went wrong, then don’t panic – it may be easy to fix. If UpdraftPlus has detected that the restoration was timed-out or crashed partway, you should see a notice at the top of the UpdraftPlus settings page with the option to resume the restoration.
Even if this doesn’t work, then there’s still nothing to worry about – the UpdraftPlus backup files are just standard zip and SQL files which can be used to restore your site manually. However, before you give up, do try looking in your web server’s error logs, and turn on WP_DEBUG in wp-config.php.